Do you know microblading is changing the lives of many people – building confidence, making convenience, and allowing people to sleep in a long time in the morning – seriously?
Having the best chance of microblading process took approximately 20 minutes off of the makeup schedule at the time of every morning.
But with growing demand and social media showcasing airbrushed lives of people, clients and artists tend to showcase best, instantly after work, generally leaving out the raw familiarity and the downs and ups that go along with the treatment of permanent makeup.
Displaying the outcomes just instantly after a process is not similar to displaying the complete procedure, and can leave customer’ that get the process with a lot of questions regarding their healing procedures.
The process itself is just about 10% of the true experience of microblading, and then after 30 -60 days is the actual deal with the Microblading healing process.
Thus for someone thinking about a procedure, and for artists that wish to show their customers what they can want throughout healing, here is the actual experience of the healing procedure for the very first month – the bad, the good, and the scabbing. Here we are sharing some Microblading Healing Process please take a look.
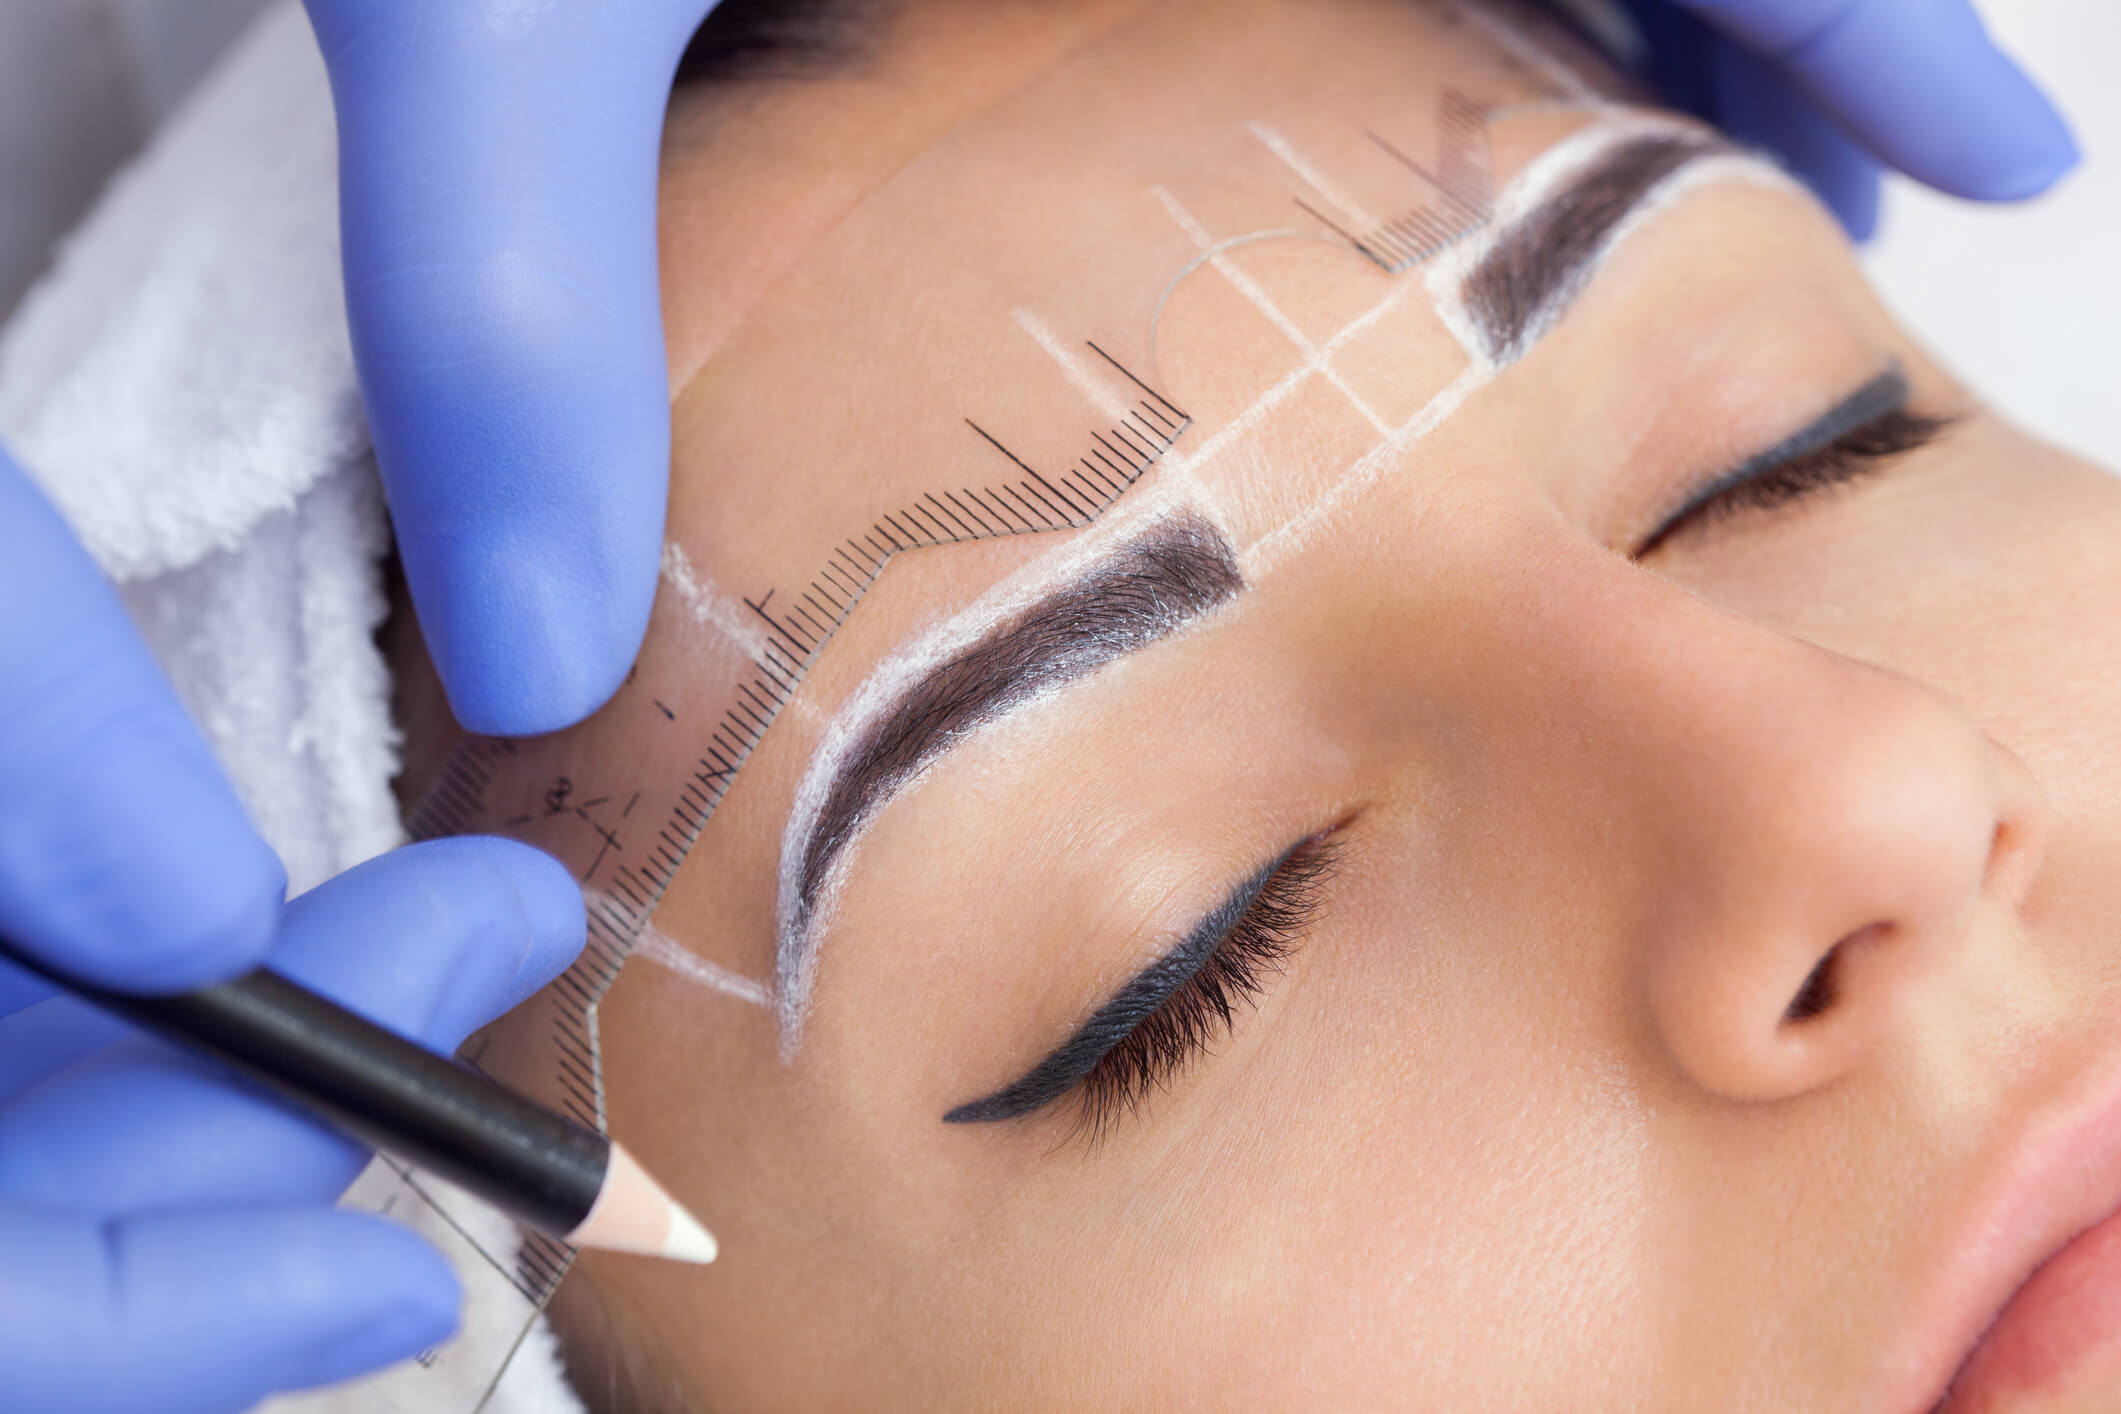
What Is Microblading?
Microblading is a semi-permanent cosmetic procedure where a trained artist uses a handheld tool to create fine, hair-like strokes in the skin. These strokes are filled with pigment, giving the appearance of fuller, natural-looking eyebrows.
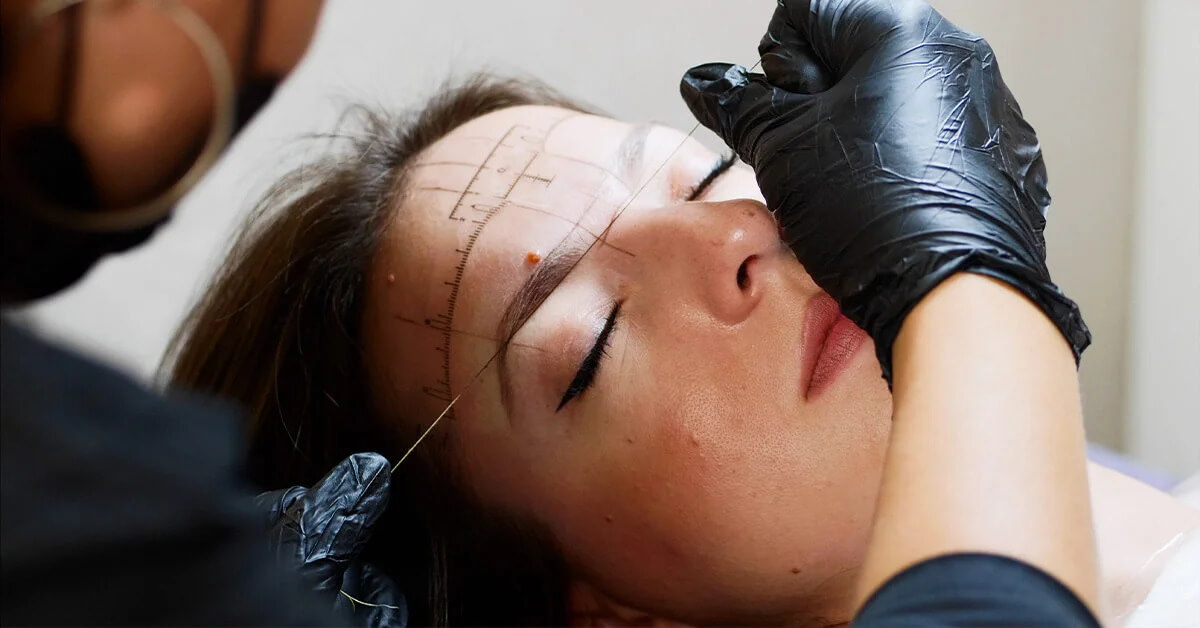
During the procedure:
- A numbing cream is applied to reduce discomfort.
- Fine incisions are made on the superficial layer of the skin.
- The entire session typically lasts 1–2 hours, depending on your desired look and the artist’s technique.
For more technical information, check out Healthline’s guide to microblading.
The Immediate Post-Procedure Period
After the microblading procedure is complete, it is normal for the treated area to appear slightly darker and more intense than the desired result. This is because the pigment is still on the surface of the skin and will gradually fade during the Microblading healing process.
In the first few hours after the treatment, it is crucial to keep the brow area clean and avoid touching it to prevent the risk of infection. A thin layer of ointment or a specialized healing balm may be applied to the treated area as per the artist’s instructions.
During the first few days, the eyebrows may appear slightly swollen, and some redness or tenderness may be experienced. It is important to avoid excessive sweating, sun exposure, and activities that may cause excessive moisture or friction on the brow area, such as swimming or using saunas.
The Microblading Healing Timeline: Day-by-Day Breakdown
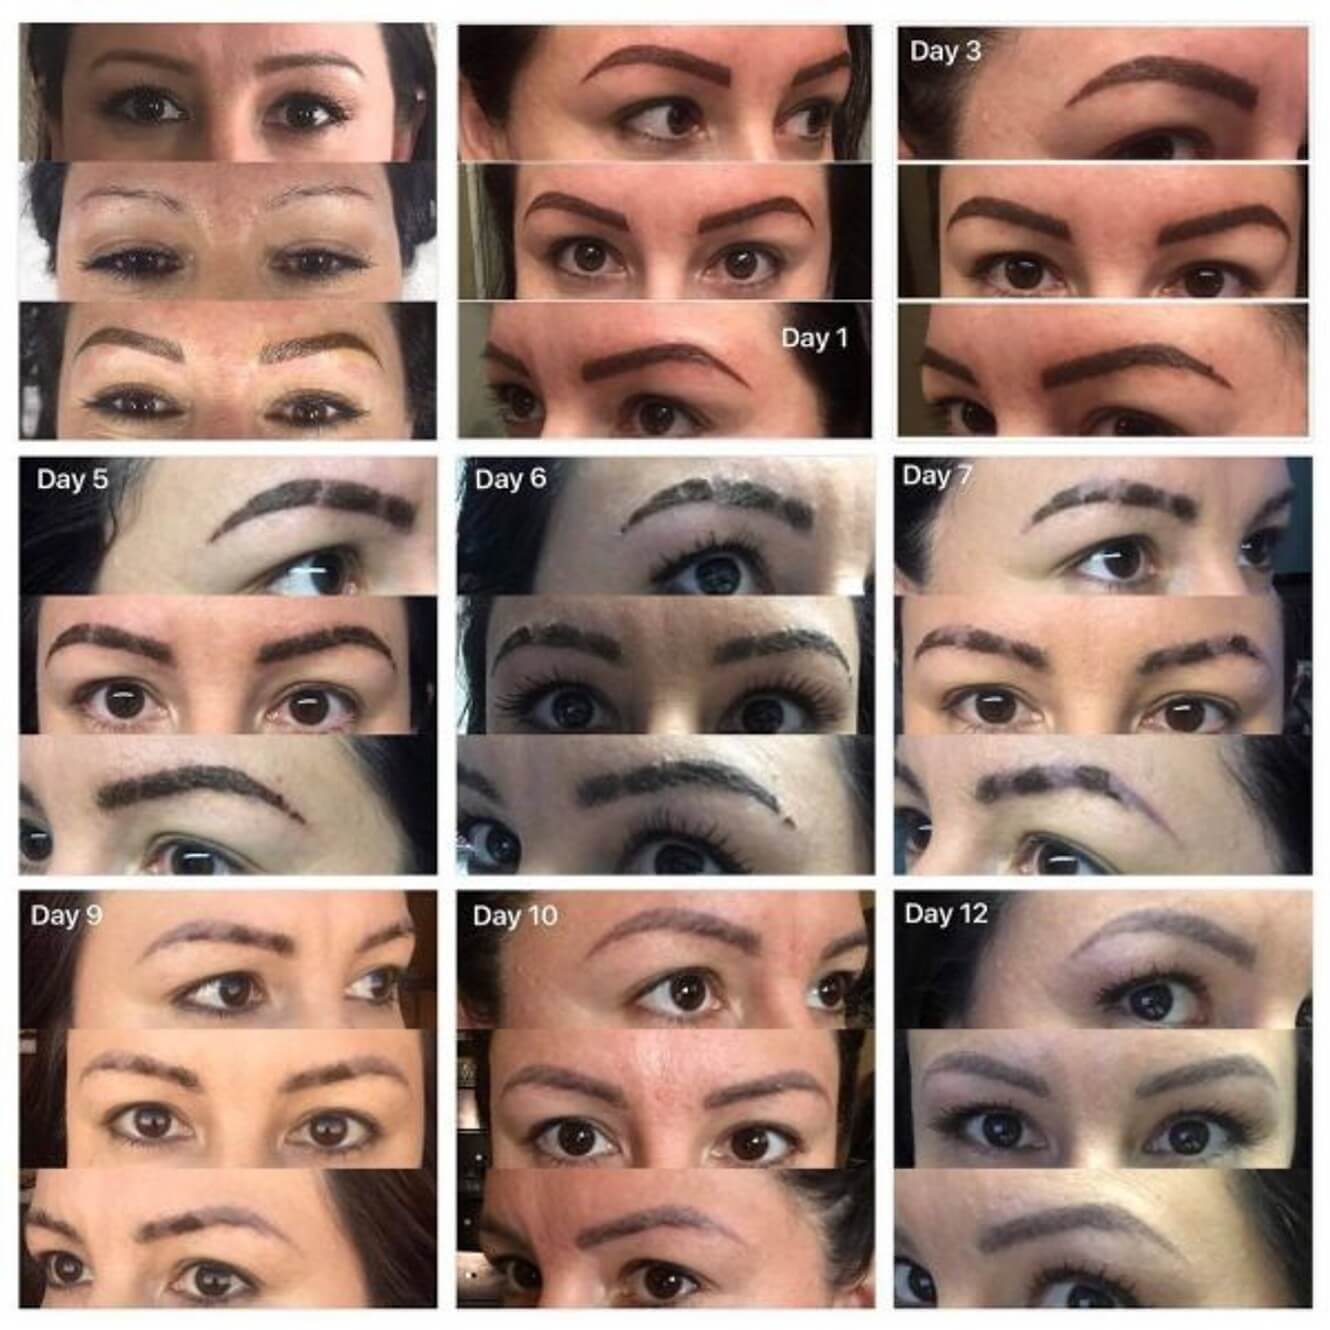
Days 1–2: The Bold Beginning
- Your brows will appear darker and thicker than expected.
- Mild redness and swelling are common.
- The color may seem too intense—don’t panic! This is part of the process.
- You may feel some tenderness or a “tight” sensation.
- Avoid touching, picking, or applying pressure.
“The initial pigment sits on the skin surface and will naturally fade over the coming days,” says Dr. Lisa Harper, board-certified dermatologist.
Days 3–4: Flaking Begins
- Brows may feel itchy, dry, and start to flake or peel at the edges.
- Do not pick the scabs or flakes! This can remove pigment and lead to patchy healing.
- You’ll start noticing some lightness in color beneath the scabs.
Days 5–7: The Patchy Phase
- Most of the scabbing is now happening.
- The brows may look uneven, lighter, or faded in spots.
- This phase often causes concern—but it’s temporary!
- Trust the healing process. Pigment will reappear as the skin regenerates.
Days 8–10: Color Stabilization Begins
- The color will begin to even out, though it may still appear lighter than the final result.
- Most flaking should be complete by now.
Days 11–30: Gradual Color Return
- Your skin continues to regenerate beneath the surface.
- Pigment can reappear or darken slightly during this time.
- Some areas may still look lighter—this is why a touch-up appointment is essential around Day 30.
✍️ Final Touch-Up: Why It Matters
Around 4–6 weeks post-procedure, you should return to your artist for a touch-up. This session:

- Refines the shape
- Corrects any patchiness
- Ensures longer-lasting results
According to the American Academy of Dermatology, semi-permanent cosmetic tattoos may fade with time and touch-ups help maintain their appearance.
Post-Healing Care and Maintenance
Once the healing process is complete, it is crucial to maintain the results and prolong the lifespan of the Micro bladed brows. Here are some essential post-healing care tips:
— Protect from the Sun
Extended sun exposure can cause the pigment to fade faster. Applying a broad-spectrum sunscreen to the brow area and wearing hats or sunglasses when outdoors is essential.
— Avoid Harsh Chemicals
Avoid using products containing retinol, alpha-hydroxy acids (AHA), and glycolic acid on or around the brow area, as these can accelerate pigment fading.
— Touch-up Appointments
Depending on individual factors and desired outcomes, touch-up appointments may be required every 12-18 months to maintain the shape and color of the brows.
Conclusion
Understanding the microblading healing process is vital to achieving beautiful, long-lasting results. By following the aftercare instructions provided by the microblading artist and being patient during each healing stage, individuals can enjoy natural-looking, perfectly shaped brows.
Remember, the healing process is unique to each individual, and results may vary. Always consult with a qualified microblading artist to ensure the best possible outcome for your Micro bladed eyebrows.
Hope you find a great solution for your Microblading Healing Process within 30 days.
Till then take care and don’t forget to check more articles on Techi Leaf now!
⚠️ Disclaimer: This article is for informational purposes only and is not a substitute for professional medical or cosmetic advice. Always consult a certified microblading artist and your dermatologist before undergoing any cosmetic procedures.